Administer Azure DevOps with Logic Apps
I have been working with Azure DevOps (formerly Visual Studio Team Services) for over a year now. Much of my time has been spent with building pipelines and working with repos, rather than administering users and projects. I don’t get much opportunity to do this in my role!
A customer recently challenged me to help them better automate the administration of their Azure DevOps account. They had a few use cases, and I have chosen the following for this blog post:
Can we automatically downgrade a user license from ‘Basic’ to ‘Stakeholder’ if they haven’t accessed the Azure DevOps service for some time?
We had a look at an Azure Function for making calls to the Azure DevOps REST API to achieve this, however, the customer was looking for a low-code solution.
Cue Logic Apps!
Read on to for a detailed guide on how to build a Logic App that will..
-
On a weekly schedule, query our Azure DevOps account for a list of users who haven’t accessed in the last 60 days
-
Send an approval email to an Azure DevOps admin that will allow them to downgrade the license, all without leaving their inbox!
Azure DevOps REST API
The Azure DevOps REST API reference documentation is a good source of information on how to structure our queries to the service endpoint. For this exercise, we will be focusing on the User Entitlement documentation, and specifically we’ll be making two calls: GET and PATCH.
If we look at a GET request as an example, our URI will look like this:
GET https://vsaex.dev.azure.com/{organization}/_apis/userentitlements/?api-version=4.1-preview.1
It can take parameters of organisation, userId and api-version. We’ll look at these requests in more detail later.
Generate a PAT
We need to authenticate with Azure DevOps in order to make calls to the REST API. There are a number of ways to do this, and the reference documentation mentioned earlier goes through these. For our Logic App, we will be making use of a Personal Access Token (PAT).
In Azure DevOps, click on your user icon in the top right hand corner, and choose ‘Security’.
It’s good practice to limit the scope of access of our tokens to only the operations we require. Make sure you select ‘custom defined’, scroll down to ‘Member Entitlement Management’, select ‘Read and write’ and create your token as per the image below.
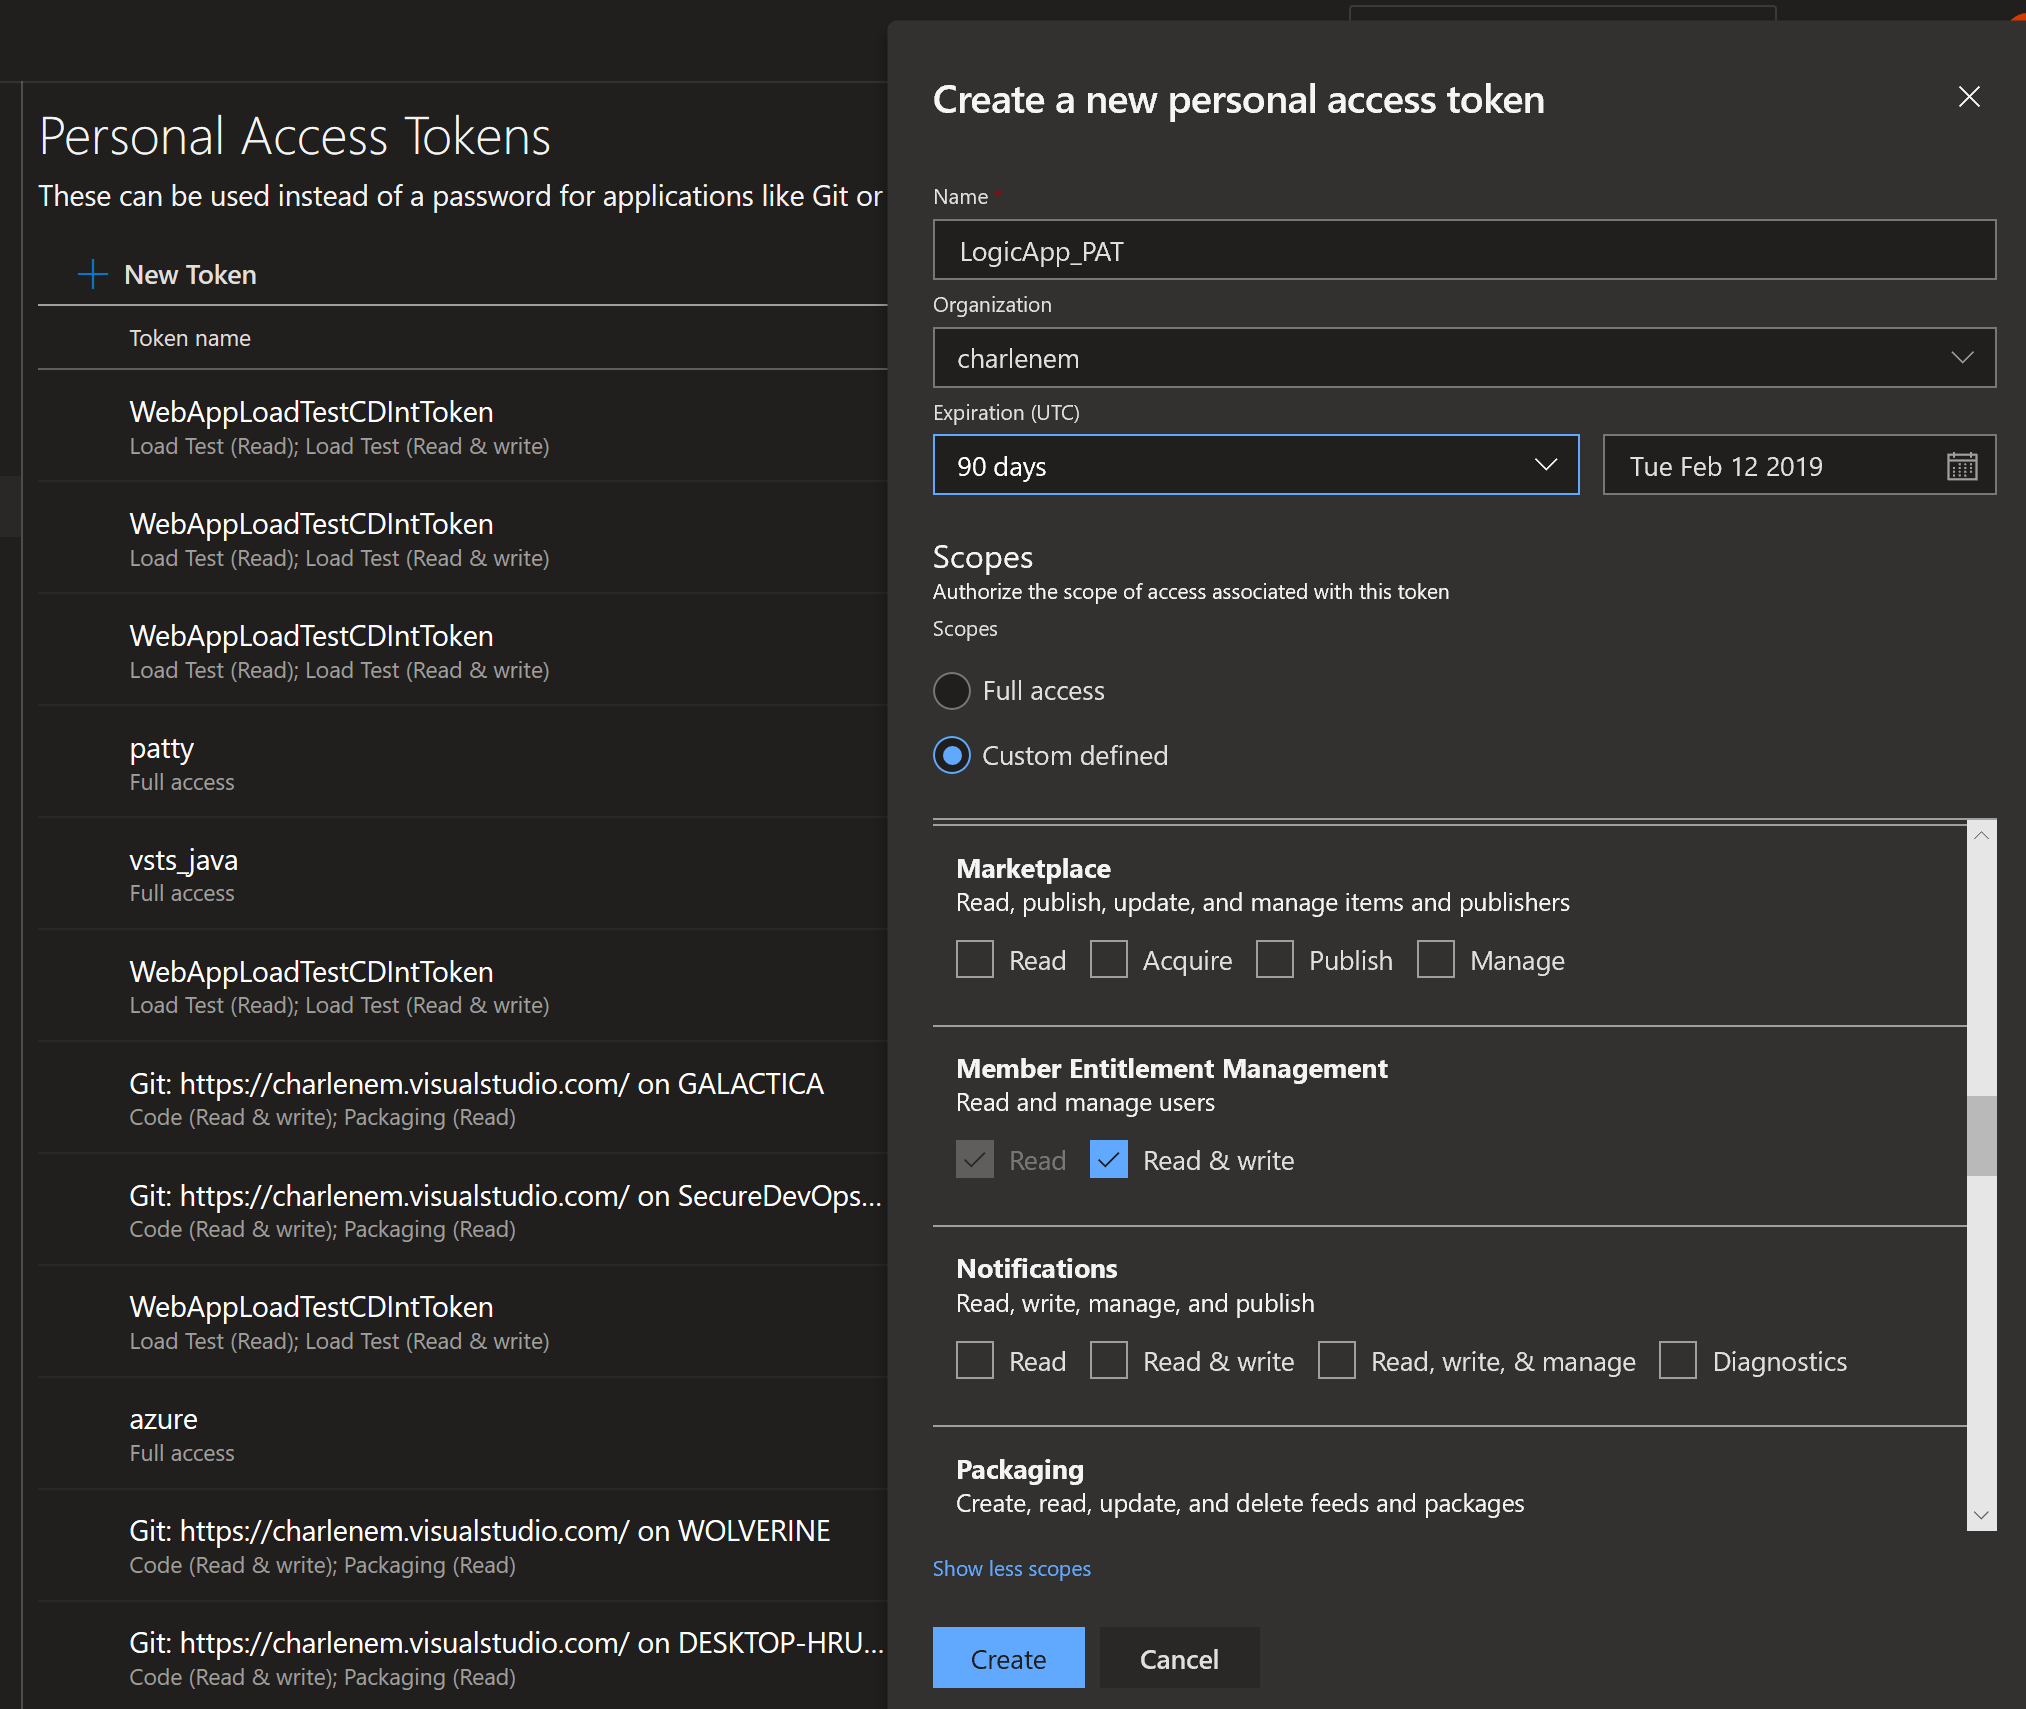
Make sure you copy and paste the PAT into a notepad - if you don’t, there is no way to view it again.
We have to Base64 encode our PAT for it to work. I recommend installing the following extension for VS Code to do this:
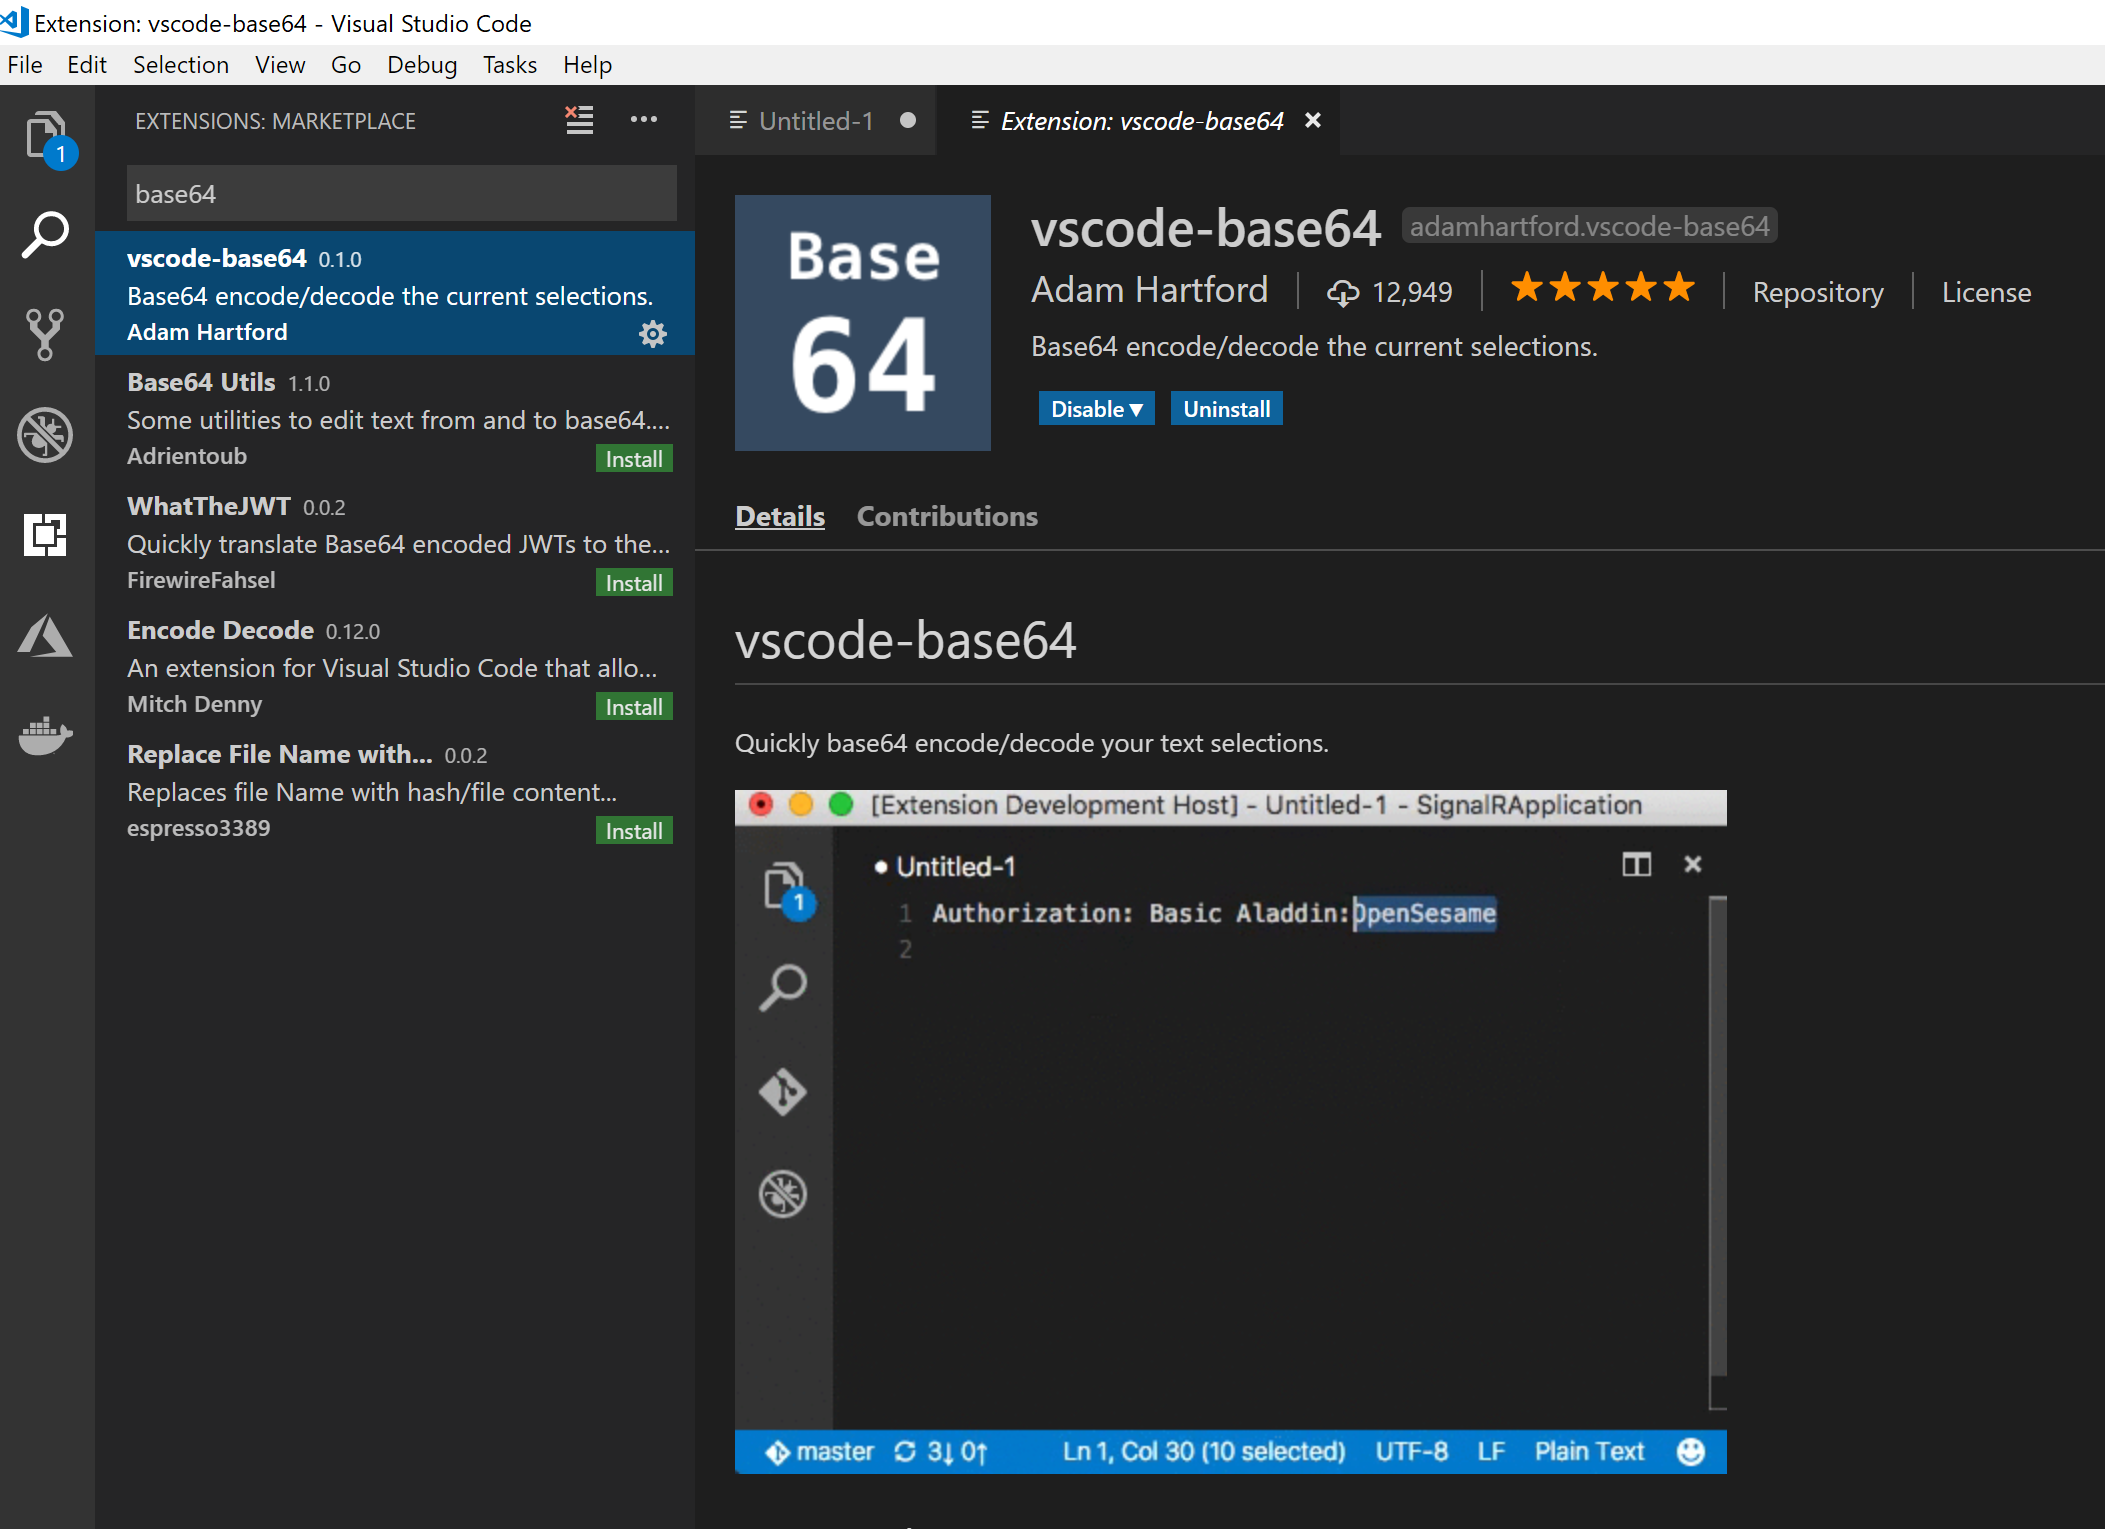
Open a new file in VS Code and paste in your PAT. We need to prefix it with a user name - this doesn’t need to be a real. You’ll end up with something like this: iamauser:v72zmw4pa373hazx7phhy9yklxh337s5am23acbrvls242mpxlra
Select the text, then hit ctrl+e ctrl+e to encode it. You’ll end up with something like this:
aWFtYXVzZXI6djcyem13NHBhMzczaGF6eDdwaGh5OXlrbHhoMzM3czVhbTIzYWNicnZsczI0Mm1weGxyYQ==
Add the word ‘Basic’ just before it:
Basic aWFtYXVzZXI6djcyem13NHBhMzczaGF6eDdwaGh5OXlrbHhoMzM3czVhbTIzYWNicnZsczI0Mm1weGxyYQ==
This is a Base64 encoded PAT - save yours somewhere for later.
Azure Logic Apps
Logic Apps are a cloud service that enable you to automate tasks, business processes and workflows in a low code fashion. Out of the box, there are hundreds of connectors to other services, including Twitter, Office 365, SendGrid, ServiceNow… the list goes on! What is really nice about them is that if you can’t find a connector you need, or perhaps you need to run your own custom code, they integrate really well with Azure Functions.
Every logic app workflow starts with a trigger; imagine a workflow to generate a report being triggered on a egular schedule, or based on some other event. Once the trigger fires, the logic app carries out the workflow, which can comprise of HTTP requests, data conversions, automated approval requests via email, conditional statements etc. I will be using all of these in this example.
Create Logic App
In the Azure Portal, create a blank Logic App. The link contains the necessary steps to do this.
Create a Trigger
We need to create a trigger to kick off our logic app workflow and for this scenario a scheduled based trigger works just fine. Search for schedule and choose recurrence. Any interval is fine, but I suggest choosing every 7 days. You can set the hours and minutes if you want to.
Call the Azure DevOps Rest API
The next step in our flow is to get a list of users from Azure DevOps.
Click Add Step in your Logic App, search for and choose HTTP. Choose GET from the drop down box, and paste in this link:
https://vsaex.dev.azure.com/{organization}/_apis/userentitlements?api-version=4.1-preview.1
Be sure to replace {organization} with your Azure DevOps account name.
Next, add an Authorization header and paste in your PAT from earlier. We also need to specify the content-type of our call, which is application/json.
TIP: I find it really helpful to give my Logic App steps more meaningful names; this helps us and others to understand what we are trying to achieve throughout the workflow. Once we add more dependent steps, it’s not easy to rename these.
Let’s test the call. Save and Run your logic app. You should see something similar to this:
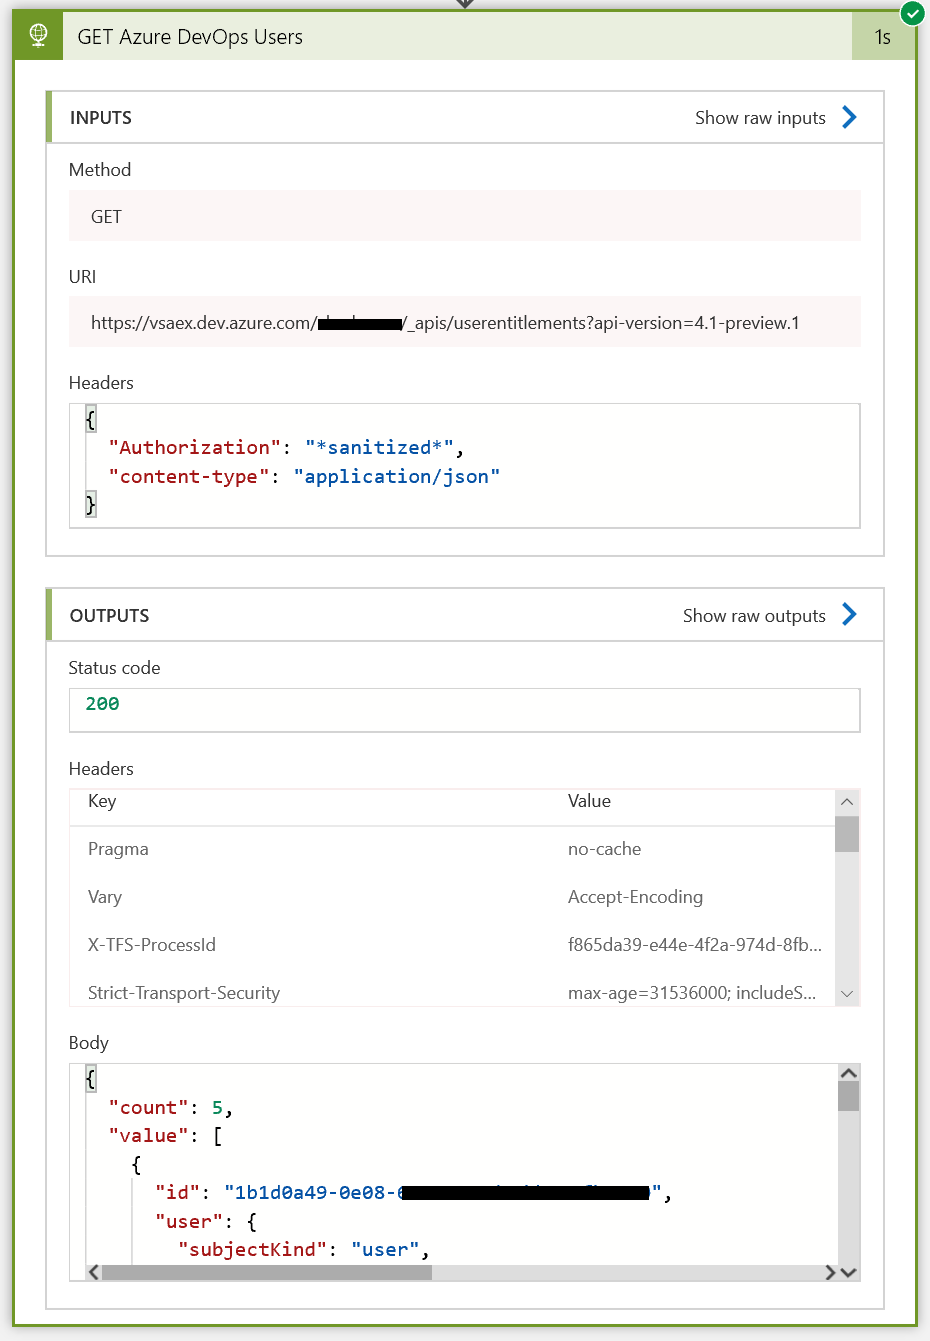
You can see our inputs are comprised of a method (GET), a URI, and our Headers, where the PAT has been sanitized.
The outputs are a bunch of return headers and a JSON array of 5 values (users).
Parse JSON
We want to be able to explore the information returned from our HTTP request. To do that, we need to use a Data Operation step to parse the JSON response.
Click Add Step, search for and choose parse json. In Content choose Body and for Schema paste in the json found below:
Test it again by saving and running your logic app. You should get a success message. What we have done here is make the data available as dynamic content types which will be really useful for the rest of workflow.
Filter array
The next thing we want to do is filter the data. In our scenario, we really care about users who haven’t accessed Azure DevOps in 60 days or more. Handily, there is a built in data operation to do just that!
Add a new step and search for Filter Array. This time we will edit in advanced more.
In the From field, choose the dynamic content of value. Below that, paste the following:
@lessOrEquals(item()?[‘lastAccessedDate’], addDays(utcNow(), -60))
This expression is looking for all objects in our array ‘value’ that have a last accessed date of today’s date minus 60 days or less.
Now we have an array of users who haven’t accessed the service in a while. Now we need to take action.
For each user, send an approval email
You have a number of options here. You could send a report containing a list of users before taking any action. You could auto patch these users and then send a report. In this case, I want to demonstrate the ability of the O365 Email connector to send approval emails.
What we want to do is loop through each user in our array, and compose an object that can be passed to our approval email.
Add a new ** ‘For Each’ Control** task. For the output from a previous task, choose **Body** from the selection of dynamic objects on the right, and then add a new **‘Compose’ Data operation** task. You can create whatever message you like here, using plain text and selecting objects that are now available to us. In the example here:
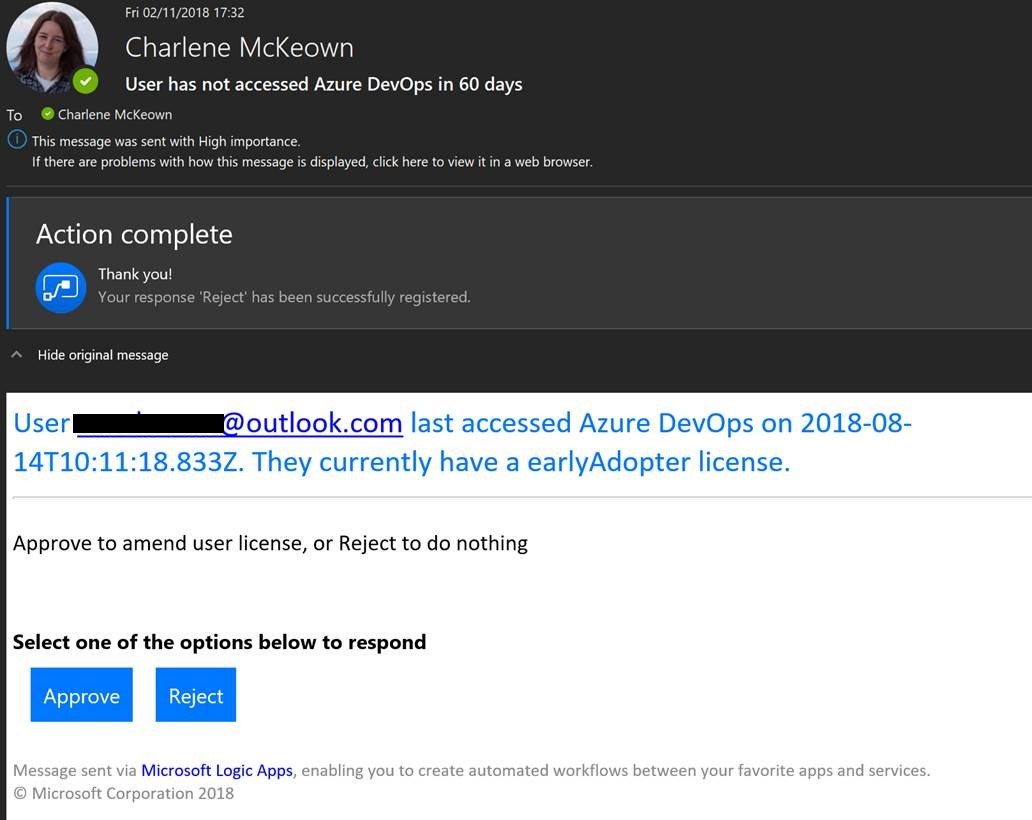
User @{items(‘For_each’)?[‘user’]?[‘principalName’]} last accessed Azure DevOps on @{items(‘For_each’)?[‘lastAccessedDate’]}. They currently have a @{items(‘For_each’)?[‘accessLevel’]?[‘accountLicenseType’]} license.
I added another Compose step to create an object of user ID. We will need this in just a minute.
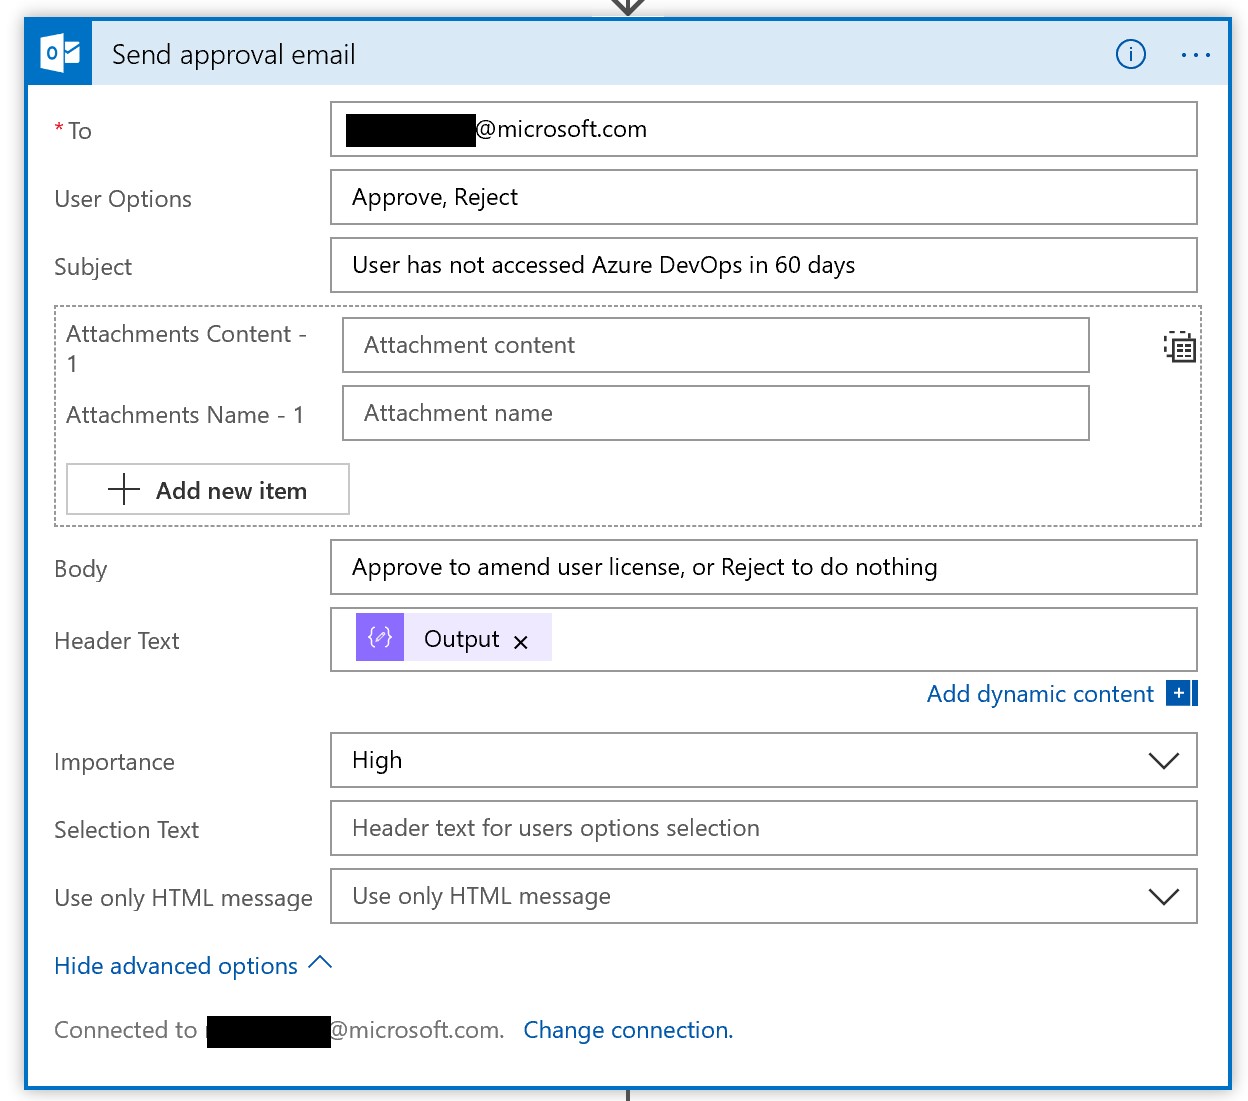
Next, add a new O365 Email approval task - you will need to sign in to authorize this connection. Once complete, fill in the fields using the image below as an example. Output is the message with dynamic objects we just created.
In this example, we have two actions; Approve or Reject. We need to tell our logic app what to do in either case.
Update user licence
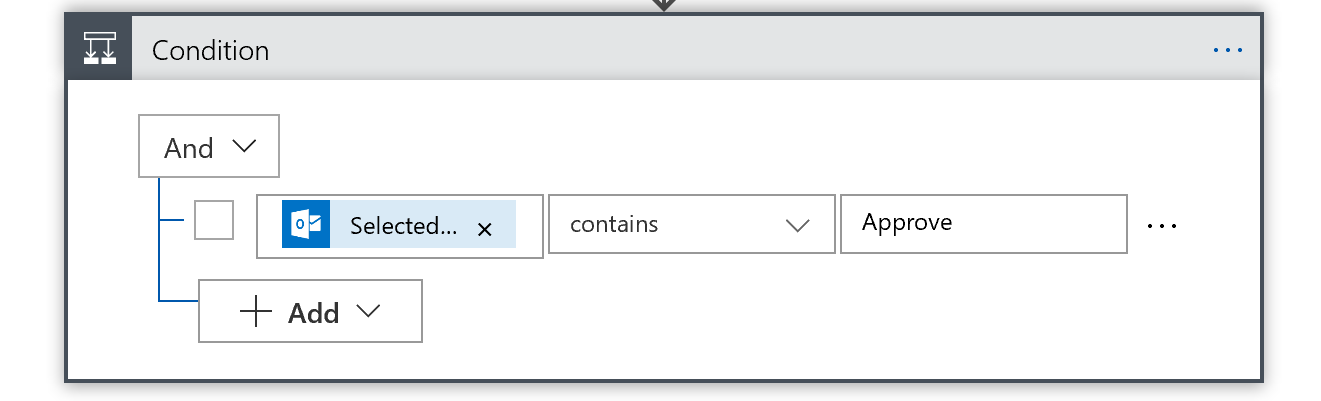
Add a Condition step and choose Selected Option from the dynamic object picker, and have that equal ‘Approve’.
If true, then a user license should be patched. To do this, we need to make a HTTP PATCH request to the Azure DevOps REST API.

There are a few important fields here. Firstly, we need to pass our User ID into the URI. Remember, we saved our user ID in an object in an earlier step. Simply add Output from the dynamic content picker to the end of our URL.
Next, we need to specify our PAT as before. We also need to specify the content-type to application/json-patch+json and pass in the api-version as a header.
In the Request Body, paste the below:
[ { “from”: “”, “op”: “replace”, “path”: “/accessLevel”, “value”: { “accountLicenseType”: “express”, “licensingSource”: “account” } } ]
op: replace refers to the operation taking place path: /accessValue tells us the path for the operation Within Value we specifiy the value we wish to update the license to.
That’s it! Save your Logic App and run it. You should get an email for every user who has either never logged in, or who hasn’t logged in for 60 or more days.
There are plenty more cases where we could use Logic Apps to optimise processes for managing Azure DevOps; not just user entitlements. This post was meant to introduce readers to the concept of Logic Apps and the REST API, and as such, the above Logic App can probably be streamlined.